

How to Keep Eye Masks From Slipping: 7 Proven Fixes
Table of Contents
- Why Your Eye Masks Keep Slipping Off
- How to Prep Skin for Eye Masks So They Stay Put
- Step-by-Step Application Technique for Non-Slip Eye Masks
- How Long to Leave Eye Masks On (And Why Timing Matters)
- Body Positioning and Gravity: Should You Lie Down?
- Choosing the Right Mask Material and Fit for Your Face
- How to Reduce Under Eye Puffiness While Keeping Masks in Place
- Troubleshooting: What to Do When Patches Still Slippage
- Frequently Asked Questions
Last Updated: September 18, 2026
Why Your Eye Masks Keep Slipping Off
Most people blame the mask when it slides, but the real problem is the surface underneath it. This guide from Sourir explains how to keep eye masks from slipping by fixing the prep, placement, and position that cause the slide.
The Real Reasons Under-Eye Patches Slide Down
Three forces work against you: moisture, movement, and gravity.
- Moisture: Wet skin breaks the seal between patch and face.
- Movement: Talking, laughing, and scrolling all shift the patch.
- Gravity: Any patch with weight will travel downward over time.
A common mistake is applying patches right after moisturizer, the cream creates a barrier, and the patch floats instead of gripping.
How Gravity, Serum, and Skin Surface Affect Adhesion
Adhesion depends on one thing: a clean, dry, flat surface. Anything between the patch and your skin weakens the bond. Excess serum is the biggest culprit, a soaked patch is heavy, and heavy patches slide. Dry, flaky patches and leftover makeup also create gaps.
How to Prep Skin for Eye Masks So They Stay Put
Skin prep is the step most people skip, yet it decides whether your patch stays put. A clean, dry surface gives the patch something to grip, and it takes under two minutes.
Cleanse, Tone, and Dry: The Non-Negotiable First Steps
Follow this order every time:
- Cleanse with a gentle, non-oily cleanser to remove makeup, sunscreen, and natural oils.
- Tone with an alcohol-free toner to balance the skin surface.
- Dry completely. Wait 60 to 90 seconds after patting dry. Any lingering dampness weakens grip.
- Check with your fingertip. If your skin feels slick or tacky, it is not ready.
Why Moisturizer Interference Ruins Adhesion
Moisturizer is a barrier product: it seals in water by sitting on top of your skin, which is great for hydration and terrible for adhesion. If you want both, apply moisturizer first, wait several minutes, then blot the under-eye area with a tissue before placing patches.
Step-by-Step Application Technique for Non-Slip Eye Masks
Correct application comes down to placement, pressure, and patience. Place the patch, press it down, and let it bond before you move, most slipping happens in the first two minutes.
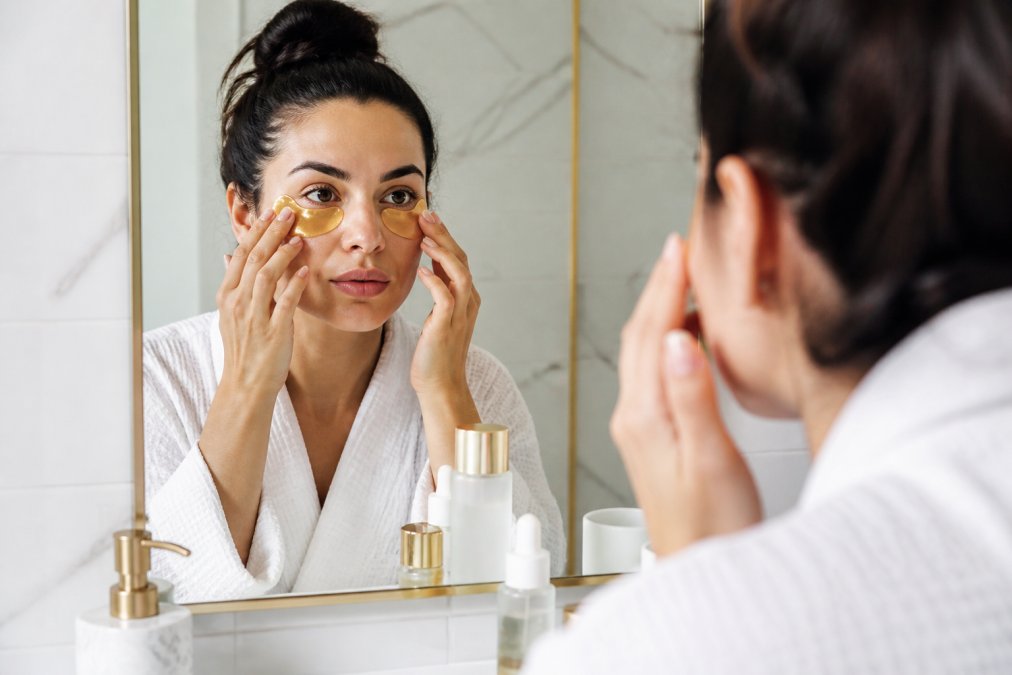
Patch Placement and Repositioning Tips
- Place the wider end toward your nose and the tapered end toward your temple.
- Line the patch up along your orbital bone, not directly under the lash line.
- Press gently with two fingers for 10 to 15 seconds to seat the patch.
- Avoid dragging the patch into place, lift and re-place instead.
- If an edge lifts, press it down again rather than pulling the whole patch off.
Managing Excess Serum for Better Grip
Serum makes a hydrogel patch feel cool and soothing, but too much turns it into a slippery sheet.
- Let patches sit in the packet a moment before opening so serum does not drip.
- Blot the patch lightly with a clean tissue if it feels soaked.
- Do not add extra serum, oil, or cream on top.
- Keep the patch flat during wear so serum does not pool at one edge.
How Long to Leave Eye Masks On (And Why Timing Matters)
Most hydrogel under-eye patches are designed for 15 to 20 minutes. Leaving them on longer adds no benefit: after about 20 minutes the patch dries out and curls at the edges, and curled edges lift and slide. Set a timer, remove on schedule, and pat any remaining serum into the skin.
Body Positioning and Gravity: Should You Lie Down?
Lying flat is the single best way to stop patches from sliding: gravity pulls the patch toward your skin instead of down your face. If you can spare 15 minutes, lie back.
Upright Application vs. Lying Flat
| Position | Slipping Risk | Best For |
|---|---|---|
| Lying flat | Lowest | Full 15-20 minute wear |
| Reclined in a chair | Low | Reading or watching TV |
| Sitting upright | Moderate | Quick touch-ups |
| Walking around | Highest | Not recommended |
If you must stay upright, keep your head still and avoid looking down. Bending forward is the fastest way to lose a patch.
Using a Headband or Satin Sleep Mask to Secure Patches
A few accessories help hold patches in place without tape:
- Wide headband: Keeps hair off your face and reduces movement near the temples.
- Satin sleep mask: Worn above the patches, it adds gentle downward pressure.
- Soft cloth headband: Light pressure at the top edge stops the patch from creeping.
Skip anything tight, fidgeting dislodges the patch.
Choosing the Right Mask Material and Fit for Your Face
Material and fit decide how well a patch grips before you even open the packet. "Hydrogel sticks better" is true but not useful until you match the material to your face shape and bone structure.
Hydrogel vs. Sheet Mask: Which Sticks Better?
Hydrogel is a water-based gel matrix, usually built on glycerin, sodium polyacrylate, or carrageenan. Those polymers hold water in a cross-linked network that softens against your body heat and flows into the fine texture of the under-eye area, that is the grip.
| Material | How It Bonds | Grip | Edge Lift Risk |
|---|---|---|---|
| Hydrogel | Softens with body heat, molds to contour | High | Low |
| Bio-cellulose | Fermented fiber, very thin, high conformity | High | Low |
| Cotton or non-woven sheet | Sits on surface, relies on serum tack | Low | High |
| Silicone-backed patch | Occlusive seal, no serum reservoir | Very high | Very low |
Ingredient-Specific Adhesion: Why Your Serum Choice Changes Everything
This is the biggest reason two people using the same patch get different results. Adhesion is a surface-energy problem: the patch grips when its gel layer makes close contact with dry skin, so anything that changes your skin's surface energy changes the grip.
- Heavy oils and occlusives (mineral oil, petrolatum, squalane, shea butter, most facial oils): These form a film, and a film is a release layer, a patch over it slides every time.
- Silicone-based primers and creams (dimethicone, cyclopentasiloxane): Designed to make skin slick so makeup glides, they do the same to a patch.
- Water-based gels and humectants (glycerin, hyaluronic acid, butylene glycol): These absorb or evaporate, leaving skin tacky rather than slick, so the patch grips well.
- Alcohol-based toners and astringents: These strip oil and leave a dry surface, helping grip short-term but potentially leaving flaky texture that creates gaps.
Anatomical Fit Variations and DIY Modification Techniques
No two faces are the same. Your under-eye curve, cheekbone height, eye shape, and eye spacing all affect how a standard patch sits, and a patch that bridges a gap instead of lying flat will lift at the edge and slide. Match the modification to your structure:
- Wide-set eyes: Trim the inner edge with clean, small scissors so the patch does not bunch at the bridge of the nose.
- Narrow-set eyes: Trim the outer tapered end instead, or overlap the inner corners slightly.
- High cheekbones: Angle the patch upward toward the temple so it follows the bone rather than fighting it.
- Deep-set eyes: Choose a thinner patch that hugs the orbital contour instead of bridging across it.
- Long face shape: Trim the tapered end so the patch does not reach the hairline.
- Prominent under-eye bags: A thicker gel patch can bridge the bag and lift at the edges. A thinner patch conforms better.
Two rules for trimming:
- Trim before applying, never after. Cutting a wet patch tears the gel edge and creates a rough border that lifts.
- Use clean, sharp scissors. Wipe them with alcohol first. A dull edge crushes the gel and leaves a ragged line.
Environmental Factors That Change Grip
Your bathroom is not a neutral environment. Humidity, room temperature, and sweat all affect how long a patch stays put.
- High humidity (steamy bathroom, post-shower): Condensation forms on the skin and patch surface, and grip drops fast. Wait until the room clears, or apply in a drier space.
- Low humidity (winter, forced-air heating): Skin dries and flakes, creating gaps under the patch. Exfoliate gently once or twice a week and moisturize the night before, not right before.
- Warm room: Body heat softens the gel, which helps conformity but can make a heavy patch sag. A cooler room keeps the gel firmer longer.
- Sweat: Any activity that raises your core temperature, a hot shower, a workout, cooking over a stove, produces sweat under the patch, and sweat is water plus salt that breaks the seal. Apply after you have cooled down.
How to Reduce Under Eye Puffiness While Keeping Masks in Place
Chilling your patches is the easiest way to reduce puffiness and improve grip at once: cold firms the gel and calms the skin, so the patch sits flatter.
Chilled Masks and Their Effect on Adhesion
Store unopened packets in the fridge for 20 to 30 minutes before use. A chilled patch is firmer, so it holds its shape against the skin instead of sagging.
- Cold reduces the look of puffiness in the under-eye area.
- A firmer patch keeps its edge sealed longer.
- The cooling feel makes you less likely to touch or adjust the patch.
Troubleshooting: What to Do When Patches Still Slippage
If patches still slide after all of this, stop guessing and diagnose. Slipping has a few root causes, each with a different fix, work through the decision tree below instead of repeating the same checklist.
Diagnose the Failure Mode First
Ask where and when the patch moves. The answer tells you the cause.
| Symptom | Likely Cause | Fix |
|---|---|---|
| Slides within 60 seconds of applying | Moisturizer, oil, or silicone under the patch | Cleanse, skip the cream, blot dry, reapply |
| Slides after 5-10 minutes | Excess serum, heavy patch, or warm room | Blot the patch, cool the room, recline |
| Lifts at one edge only | Anatomical misfit or a flaky patch of skin | Trim to fit, gently exfoliate the night before |
| Slides only when you talk or smile | Movement, not adhesion | Stay still, or switch to a thinner patch |
| Slides in a steamy bathroom | Humidity and condensation | Wait for the room to clear, apply on cool dry skin |
| Slides after 20+ minutes | Patch drying and curling | Remove on schedule, do not extend wear |
| Slides only on one side of your face | Asymmetry in bone structure or skin texture | Trim that side differently |
The Full Pre-Flight Checklist
Run this before every wear. It takes under two minutes and eliminates almost every slip.
- Skin was cleansed with a non-oily cleanser
- No moisturizer, oil, silicone primer, or eye cream applied directly before the patch
- Skin was patted dry and left to air-dry for 60 to 90 seconds
- Fingertip test: skin feels matte or tacky, not slick
- Patch was pressed down for at least 10 to 15 seconds
- Patch was trimmed to fit your eye shape, if needed
- You stayed reclined or flat during wear
- Room was not steamy or overly warm
- Wear time stayed under 20 minutes
- Patch was fresh from its sealed packet, not reused
When the Checklist Fails: Three Deeper Fixes
If you have run the checklist and the patch still moves, the problem is structural, not procedural. Try one of these.
When to Stop Troubleshooting and Switch Products
Sometimes the patch is the problem. If you have fixed your prep, environment, and positioning and it still slides, the material or cut is wrong for your face, anatomical fit varies by brand and mold, and a patch that fits one person may bridge on another.
Frequently Asked Questions
Why does my eye mask keep falling off?
Eye masks slip for three main reasons: oil or moisturizer on the skin surface, too much serum creating a slippery layer, and gravity pulling the patch downward when you're upright. Start with clean, dry skin, blot away excess serum before applying, and lie flat for the first 10 minutes. A hydrogel patch adheres better than a thin sheet mask because its weight and texture grip facial contours more effectively.
Should I lie down while wearing eye masks?
Yes, lying flat for the first 10 to 15 minutes dramatically reduces slipping. Gravity pulls patches down when you sit or stand, especially if the serum hasn't fully absorbed. If you need to move around, apply the mask while reclined, then transition to upright once the patch has tacked onto your skin. Using a headband or satin sleep mask can add extra security if you must stay upright.
Does skin prep affect how well eye masks stick?
Skin prep is the single biggest factor in adhesion. Cleanse with a gentle, non-oily cleanser, pat dry completely, and skip heavy moisturizers directly under the eye before applying patches. Moisturizer interference creates a barrier that prevents the hydrogel from making contact with your skin surface. If you use an eye cream, apply it after removing the mask, not before.
How long should I leave eye masks on?
Most hydrogel under-eye patches work best in 15 to 20 minutes. Leaving them on longer doesn't improve serum absorption and can actually cause the patch to dry out and lift at the edges. If you're using a chilled mask for puffiness, 10 minutes is enough for a cooling effect. Set a timer so you don't forget, and remove gently from the outer corner inward.
Slipping eye masks are almost never the mask's fault. They are a prep, placement, and position problem, and all three are fixable in minutes. At Sourir, we build self-care essentials that fit into a real routine, with affordable pricing and quick shipping, so you can actually stick with it. Browse the Sourir eye care collection to find patches and creams made for daily use, then see how a two-minute prep change keeps everything in place.